Hi Friends,
In our "Transitional Master Bedroom in Neutral" feature, I promised instructions on adding crown molding to your space. Below are the instructions which will add architectural detail to any room; another weekend project. An average room will take approximately 6 to 8 hours at a cost of $100 to $150 at your local hardware store.
Steps:
1. Paint crown molding before installing.
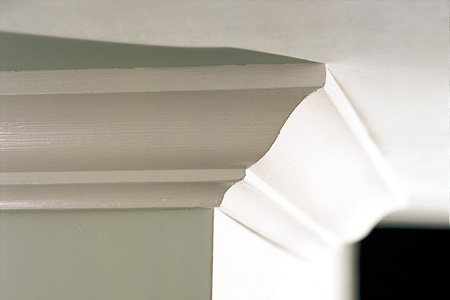
2. Start in one corner, working around the room. In order to account for out-of-square corners, cope the molding in the corners instead of miter cuts.
3. Once all the molding is up, cover any gaps/seams with caulk.
To Cope Molding:
1. Install the first piece of molding on the most noticeable wall.
2. Cut a miter on the second piece. Place the molding in your miter box and cut an open miter, which is a 45-degree cut where the back of the molding is longer than the front. Once the cut is made, you should see the cut grain from the front of the molding.
3. Use the edge of a lead pencil to highlight the line where the face of the molding meets the cut grain to get the exact profile of the molding.
4. Using the coping saw, cut along the highlighted line. Hold the saw on a slight angle to give it a back-cut, so that you're removing more material from the back of the molding. This gives the joint a much tighter fit.
5. Nail into the ceiling and the wall. Fill the holes and touch up paint.
You can do this, however, your local hardware store or home improvement center can miter cut the molding for you but it will cost. If you elect to have pre-cut molding be sure to double check your measurements.
Check back for more ideas, instructions and enjoy your crown molding project.
Your kind contribution will allow us to continue sharing great, no cost and cost saving ideas for your space. Click the "Donate" button below to make a contribution. Thank you!
Live well,
Yvonne
I love crown molding and think it adds a lot to both the value of a home as well as the overall feel of a home. It adds class and a general sense of completeness. That being said, while it is a relatively easy thing to accomplish in the world of DIY projects, it can be an overwhelming notion when one takes note of the many corners twists and turns that make up the walls of his or her home. Thank you for the helpful hints as to how to accomplish this project. I find these instructions to be extremely helpful!
ReplyDeleteYou're welcome and thank you for your kind comment.
ReplyDeleteRemember to check back soon or additional tips.
The following steps above are a great starting point for anyone planning to install crown molding within their home. I would also suggest reading detailed installation guides and watch some "how-to" install crown molding videos. All of these tools with give you firm knowledge of what to expect when you install your molding.
ReplyDeleteGreat article.
mary
Hi Mary,
ReplyDeleteThanks for your comments. "How-to" videos and installation guides are absolutely a plus.
Again thank you and remember to check back for more information and cost-saving decor ideas.
nice..
ReplyDelete